|
The Building of the Goose I was not going to build a Goose. I was done with box boats after the 2014 Texas 200. Then I saw a couple videos of Ian Henehan sailing his Goose at over 12kts and decided maybe I'd better give it a go. There is a lot to be said for box boats. No, they are not "boaty" shaped or all that aesthetically pleasing, but they are very (very) stable, carry a LOT of crew or cargo, and they go like stink on ice. From a building standpoint, they are very easy to build and they make very good use of the materials - not nearly as much waste as when building a pointy boat. Practicality won out, and so we started.
The shape: Not all that pretty, but prettier than a box boat has
the right to be. This is another reason I like the Goose design:
Like it's ancestor, the Puddle
Duck Racer, you can do anything you want with the topsides and
sails - builder's choice, designer's dream. Mik Storer, the primary designer of the Goose, advised me to "Build LIGHT" which I had every intention of doing, until I saw this Alowood at the local Bargain Barn. I first noticed it was knotless - all 5/4 x 6 x 10 feet of each stick. Then I noticed the beautiful red color. Lastly, I noticed the weight, which is more than good old Doug Fir - but it was PRETTY! I went with Alowood. Normally, people start building the hull of the boat first - they get the big part done, then get bound up in the minutia of all the fiddy bits as they try to get their boat into the water. I was going the other way - starting with the fiddy bits - the mast and spars, in particular. The original sticks were only ten feet long, so I had to scarf the spars and the parts for the mast. Nothing is more fun than making wood longer. Patience and Connie came by the Boathouse and got pressed into helping me assemble the mast. It is a hollow box that tapers as it goes up - it's good to have helpers. After the epoxy cured, I took my favorite sander with a 36 grit belt to it to smooth out the joins. A 3/8 roundover bit makes the corners nice and smooth. I should probably get a 1/2" roundover Is Alowood strong enough for a mast? Well, it held me up, so that is plenty strong. Mast and spars shaped, it was time to turn to on the foils - the rudder and leeboard. I liked how the Alowood looked, and I had some Mahogany that had been donated to us, so I started doing Alowood/Mahogany glue-ups. 12" power planers are NICE. Mik is pretty particular about his foil shapes, so I made a template to help me out. (out of sequence) Midnight Mike came down from Astoria and varnished the mast, spars, and foils. (out of sequence) Oh, those are PURTY! Next was making a piece of plywood 12' long. I used Dynamite Payson's method of fiberglass on both sides. Speaking of sides, it was time to work on them as well. Abby had stopped by, so I had her help me out. The sides are made out of 1/8" (4mm) ply.
There is a slight reverse sheer on the sides - a small sheer, only rising 2", peaking at the 5' mark from the stern. I want to be able to row this boat comfortably but I don't want too much freeboard. Also, rather than have full length airboxes, I freed up the middle for storage, there'll still be plenty of flotation in the ends. The sides are 4mm while the bottom and transoms are 6mm. Everything is framed in with 1x1 Doug Fir. Bob D. came by for a visit while I was coating the internal surfaces with epoxy. It gets hard to coat them once everything is together. Those bare spots are the cutouts on the internal bulkheads - no reason to waste epoxy on those. We were getting ready to go 3D - pre-drilling pilot holes for the screws. Here we go - sides attached to the transoms, bottom ready to go. . Goose sailboats get their hull number based on the date they go 3D, and this day was January 31, 2015. Hull numbers are done in the YYMMDD format, so we got 150131, which is prime. Auspicious? I'd say so. Screws out, toothpicks in. 3/8" roundover again - followed by the angle grinder and sander. I just 'glassed the corners - using 12 oz biaxial 6" wide tape from Duckworks. 6 oz would have been much more appropriate, but 12 oz is what I had. There we go. Time to roll her over. Mike L had stopped by for a visit, so I got to be the photographer while he and Geoff did the work. That little round thing is the reinforcement for the bow eye. We put up some temporary bracing to keep the sides true and keep twist out. Instead of keeping it simple, we were going to see if we could so a small cuddy with a curved top for the foredeck. It was touch and go for a while - I was constantly tempted to just cut it off flush, but Geoff is a good craftsman and went to work on the curved deck beams. While Geoff worked on the deck beams, I installed the airbox bulkheads. Deck beams temporarily held in place, it was time to figure out the mast rake and placement. I have no idea what I'm doing. My mast step - there'll be a 3/8 bolt through the middle there and a notch on the bottom of the mast. Another coat of epoxy before the decks go on. OK, deck beams in place, mast step and partner are in place, looks like time to put it all together. Dry fit the side decks Dry-fit the fore and aft decks. Rann stopped by so I put him on making the rudderhead. Checking final fit. I believe in painting the insides of airboxes, so tape tape and more tape. Easier to paint before the decks are on. These gudgeons from Duckworks are really heavy duty. I wanted them installed before I'd have to crawl under the aft deck. Side decks on Foredeck Epoxied. That's purty. Now it's all together, it's time to start drilling more holes. Blocks for the downhaul and a cleat for the bleater. Leeboard in place. (out of sequence) Rudder checks out Oh, my, we are getting close now - lashing the sail to the spars. The sail is an 89sqft Balanced Lug from Really Simple Sails It is EXCELLENT. I made a roll around cart to make it easier to maneuver the boat in the shop. First time in the sun - and time for us to begin frigging with the rigging. I'm lashing the blocks onto the spars - just because it looks cool. Launch Day came - the roll around cart came in handy for getting the boat up to the parking lot. A very good friend of the Boathouse, Virgil G. gave me this rigging knife a couple weeks ago. It came in very handy. Yard sailing - mostly rigged and looking pretty. She hit the water on April 17, 2015, at the Depoe Bay Boatshow. I pressed a couple of kids into being crew and sailing buddy David as helmsman. The wind was blowing very strong and right in our teeth. This is a great boat. The kids paddled dead into the 15-20mph wind with relative ease. I did some final rigging and had some friends around while she was cast off, under sail, for the first time.
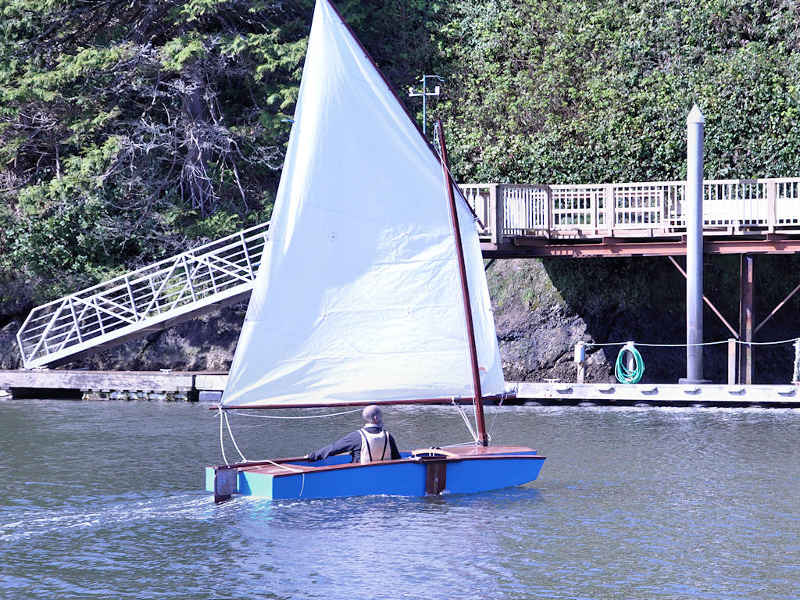
(photo credit: John Kohnen) Oh, she sails sweet. Really skims along. Well balanced and smooth.
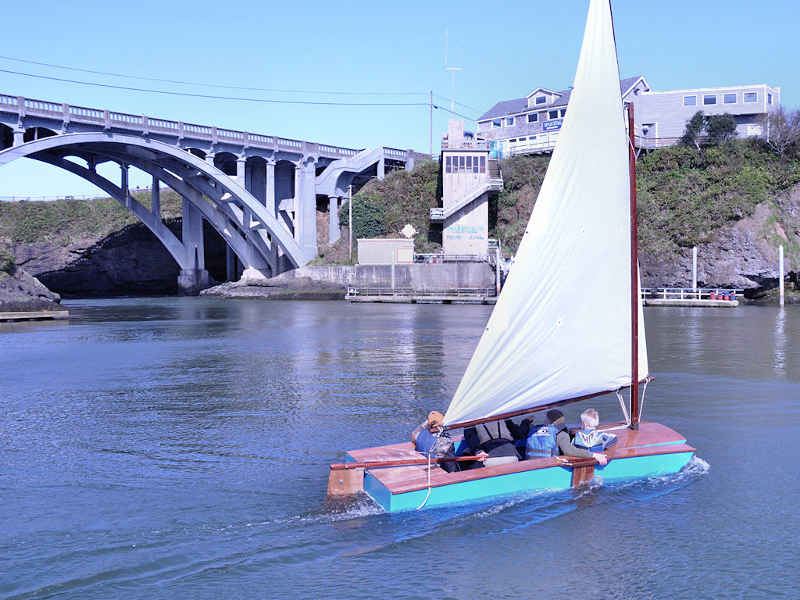
And now with a crew of five. I need to shorten the tiller to give us more options for trim - five is a little crowded.
|


