|
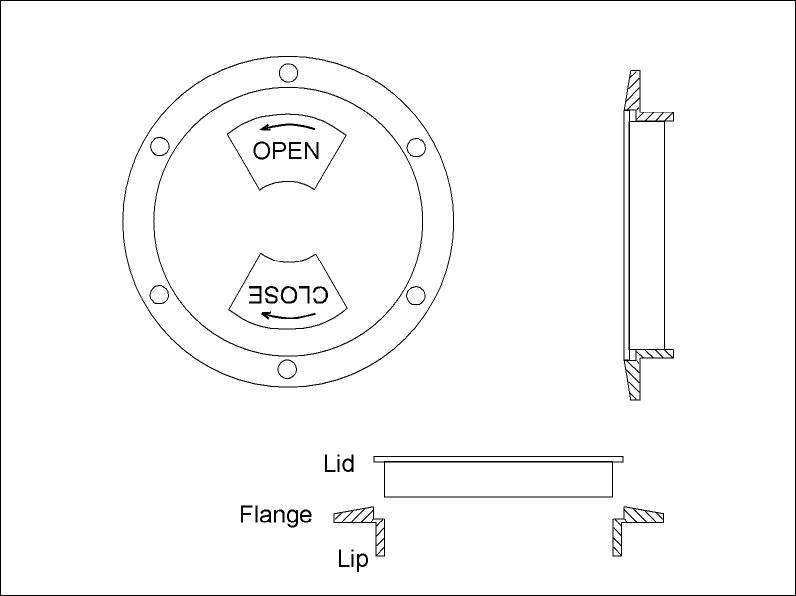
Installing Hatches One of the mantras in small boat design is "Space is a premium, and to save space, everything should have more than one purpose." To this end, many boat designs use the seats and internal bracing to create empty spaces that, when closed off, become flotation chambers - aka air boxes. There are a couple of problems with making closed off places in your boat: 1) They take up space - sometimes a lot of space. 2) Water is insidious, relentless, and persistent - it will get into any space it can. Left to it's own devices, water will rot your boat. The easy solution is to put an inspection port in your air box - a hole big enough for you to reach in with a sponge or towel and get any moisture out. If the inspection port - and the air box - is big enough, you can use it as a storage space and get a little bit of your boat's real estate back. Lots of people like to seal off these inspection ports with a hatch - something as simple as a board covering the hole, held in pace with a bungee cord or as complex as a hinged and gasketed window. Here at the Boathouse, we usually use 1/4 Turn Deck Plates from Duckworks as our hatches. They are cheap, effective, and come in useful sizes. They have two pieces - the lid and the flange
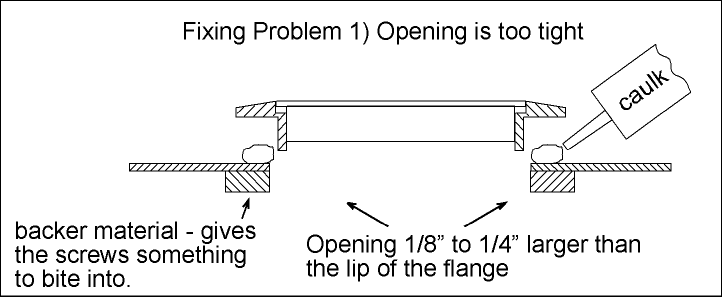
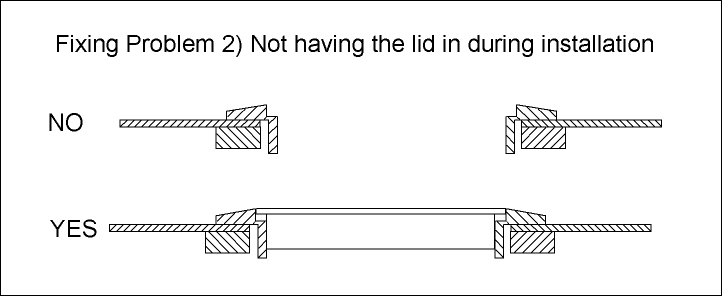
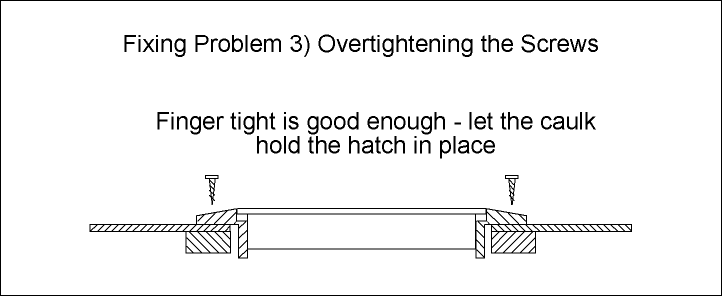
The biggest drawback to using these hatches is that they are fairly easy to goober up the installation, slightly deforming the flange, making it nearly impossible to open or close the lid. There are three main reasons an installation gets goobered:
Make sure to use lots of caulk (non-silicon, usually labeled as "paintable") and make sure you clean up the excess before it cures and becomes an unsightly, un-removable, blob.
The structure is much more rigid when the lid is in place.
That's it - if you can keep your installation loosey-goosey and let the caulk do all the work, you should be golden.
|


