|
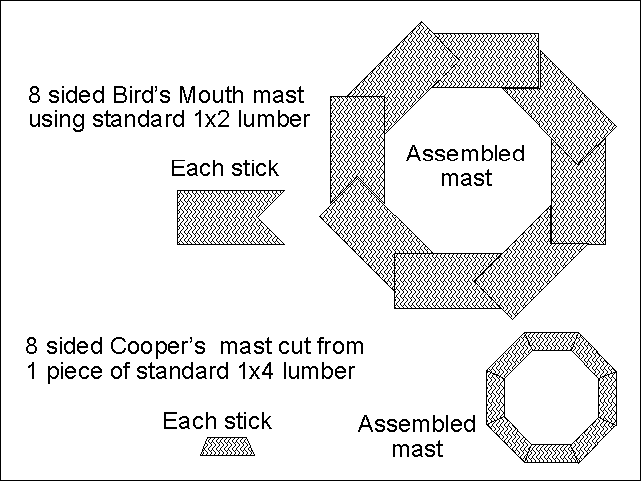
The Cooper's Mast There are lots of ways to make masts - from using a plain old tree to using 2x4s to shaping and shaving staves to make masts that taper at one or both ends. This essay describes the Cooper's Mast, a building method similar to the more traditional Bird's Mouth Mast, but easily accomplished with readily available lumber and a tablesaw. A little history: A Cooper was the profession of making barrels. Most ships in the Age of Sail had a Cooper on board, someone who saw to the assembling and disassembling of barrels. Coopers were skilled artisans, ranking somewhere between officers and seamen and were not used to stand watches or operate the boat (except in times of emergency - of which there were many.)
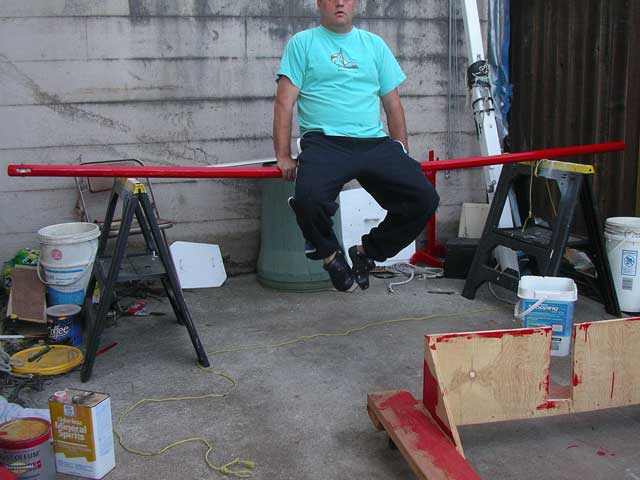
The Bird's Mouth technique is so called because each stave has a notch cut out of one side (making it look like a bird's mouth.) The next stave nests into the notch, creating a strong, secure mounting surface. The Cooper's technique doesn't use a notch, just like wooden barrels don't use a notch. This essay shows how to make a very strong, very lightweight, Cooper's mast from a standard 1x4. The resulting mast has walls that are 1/4 inch thick and measures just under 2 inches across the flats. As always, you want to choose the clearest piece of lumber you can find, but each stave is glued to the neighboring staves, and a builder can stagger the knots to minimize weaknesses caused by knots.
You will be working with sticks that are very thin and long. Using rollers or some method of supporting the sticks as they come off the saw is advised.
The angle of the edge determines the number of sticks needed to 'complete the circle.' The math is 360/(#staves*2) - degrees in a circle divided by the number of , each stave having 2 mating surfaces. For an 8-sided mast, the edge angle is 22.5°. For a 12-sided mast, you'd use a 15° edge angle, 6-sided = 30°. These sticks are thin and wobbly. You may want to have a guide to help you feed the boards. This becomes more important as you make longer and longer masts. The edge angle is critical and should be set as carefully as possible. The width of the sticks is also critical - as it determines the diameter of the mast. Because we cut our sticks from 1x4, all our sticks have a width of 3/4 inches.
For each stick, lop off the first edge, then swing the stick around and knock off the opposing edge. Be very careful - a table saw will be just as happy to lop off your fingers in addition to the wood.
The dangerous part is over. Now it is time to practice assembling the mast. Lay the sticks on a flat surface with the narrow side down. Get them aligned and space them a little, then and lay a few pieces of tape across the backs.
Using the tape, flip the sticks over and then roll the mast up. If the sticks don't meet correctly, lay it out, adjust the tape, and try again.
Once the spacing and alignment is correct, you can glue and assemble the mast. Nearly any glue seems to work: TiteBond II or III, Gorilla Glue, epoxy, and PL Premium have all been used successfully. Some people have suggested a trick to help minimize glue runs: When you get the spacing and alignment right, but before you apply the glue, wrap the mast up, then run a line of tape along the OUTSIDE of each seam (except the last seam, of course.) Unwrap the mast, apply the glue, wrap it back up, and then run a line of tape down the last seam - that will keep the glue from running all over the exterior of your mast..
Reinforce the parts of the mast where you will be attaching hardware or sheaves and also where the mast meets the mast step and mast partner. For this mast, a piece of closet rod was trimmed it to fit into the mast tube. A 20-inch piece in the bottom and a 10-inch piece in the top. Remember, you do not have to be precise! Just get something in there that will hold the sides out. If you know the direction of the force, you could even just have a 1/4 inch thick slice of wood in there holding the opposing sides apart.
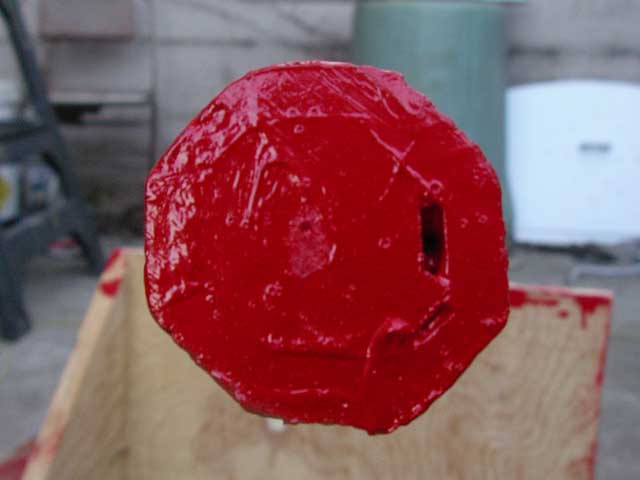
SUMMARY The Cooper's process is easily adjusted to make masts and spars of varying diameter and wall thickness. The thickness is purely your choice on how thick you make each stick and the mast diameter is a function of the width of the stick. To get a rough estimate of the mast diameter, take the width of the sticks, multiply by the number of sticks, and divide by pi. For this mast, the estimator equation is (.75 x 8) / 3.141 = 1.91 inches diameter. In real life, the mast is about 1.81 inches across the flats and 1.97 across the corners. If you want to round your mast, make the walls thicker and sand the corners. 1/4 inch thick walls are plenty thick for 10 or 12 ft masts, but you might want to beef things up a bit for longer masts. It should be possible to connect several of these masts together by inserting a plug at the join (similar to the reinforcing described above.) A true craftsman could probably scarf a bunch of the sticks together and assemble a mast as long as he likes (making sure the joins don't match up, of course.) Note from a Builder: "One thing I have learned in the last couple of days is that after the mast is glued and rolled up is to spiral wrap it with cheap (-$1 roll will do several masts) electrical tape stretched tight as it is wrapped at about a two inch spacing. That provides the clamping pressure to insure a good joint. The process of wrapping with the still wet glue will also help the mast become a perfect octagon on its own and also even up the edges perfectly. I produced 64' of mast in less than 8 hours not including dry time. They are perfect. The flat sides of the mast can be sanded with a belt sander in no time and are furniture quality. The key to the whole process is the jig that you must create for the table saw to handle the little sticks." |


