|
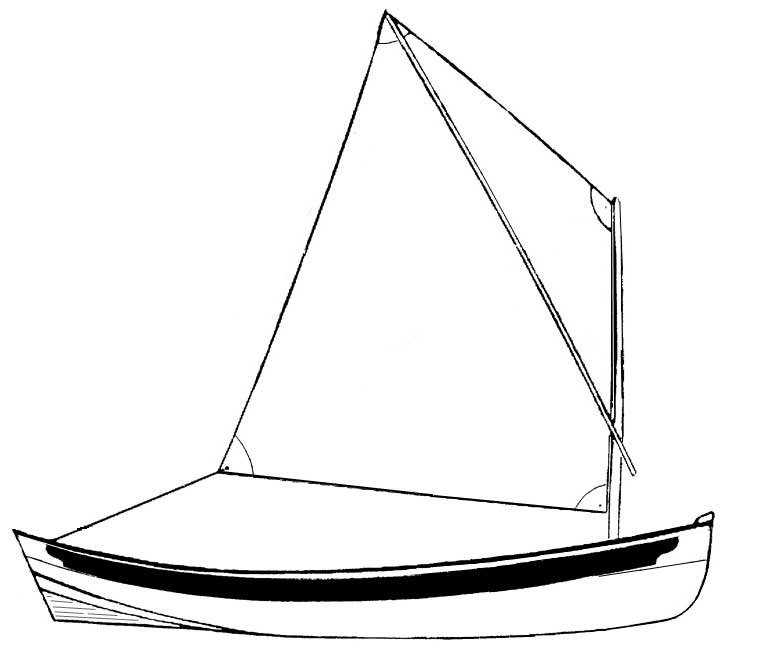
Previous Entry: A Little Background Design and Layout The Shenandoah Whitehall was designed by Dave Gentry of Gentry Custom Boats. It has an overall length of 14ft and a beam (width) of just under 4ft. Dave designed her to use a 45sqft Spritsail, like a traditional Whitehall. Her waterline should give her a max theoretical speed of just over 5 knots (just under 6mph) which is fine and dandy. As best I could, I ran her design numbers through HULLS, a boat
design program, and with a total load (boat, crew, gear) of 650lbs,
I should still have over 7 and a half inches of freeboard. That
might sound skinny, but it is still more than Bligh had when he
was put off the Bounty. This is what she might look like when completed:
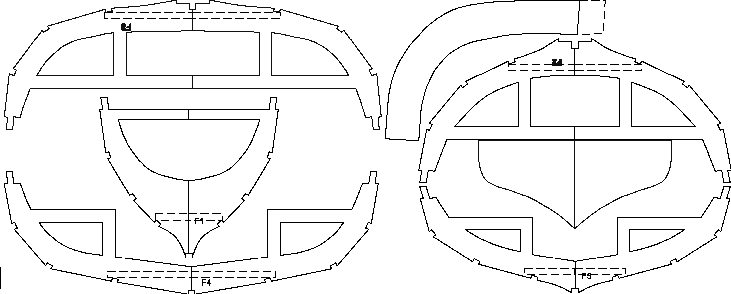
(image has been altered - Contact Dave if you want specifics) When making a Skin-on-Frame boat, you build a skeleton of frames and stringers. The frames hold the stringers in place like your backbone holds your ribs in place, and then you cover it all with a 'skin' made of polyester cloth. My first step was to take Dave's info and lay out the frames. I started by putting his data into my drawing program, getting an outline of what the frame will look like:
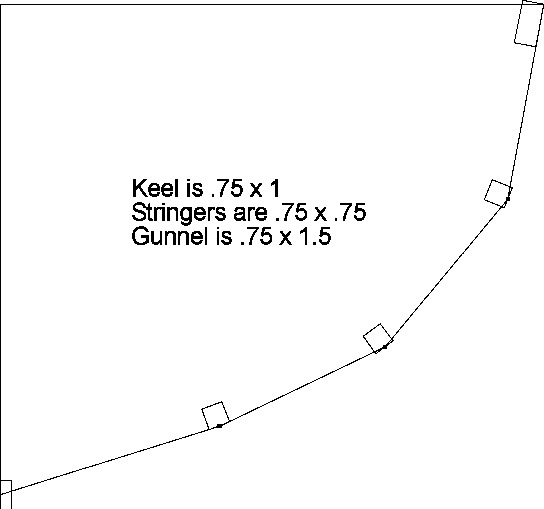
In boat builder speak, HB means Half Breadth, the distance from the centerline out to a point. HAB means Height Above Baseline, the distance up from (usually the bottom of the boat. NOTE: I do the following steps differently from other people. Your results may vary. Next, I need to figure out where the stringers go. I center the outside face of the stringer at the corner of the frame.
The keel, stringers, and gunnel need to 'stand proud': project from the frame so the skin never comes into contact with it. The frame should be ~ 3/8" shy of the corner of the stringers and ~1/2" shy of the corner of the keel. Water pressure will push the skin in, and most of the pressure is between the keel and Chine 1, so having a little arc in there might help keep the skin off as well.
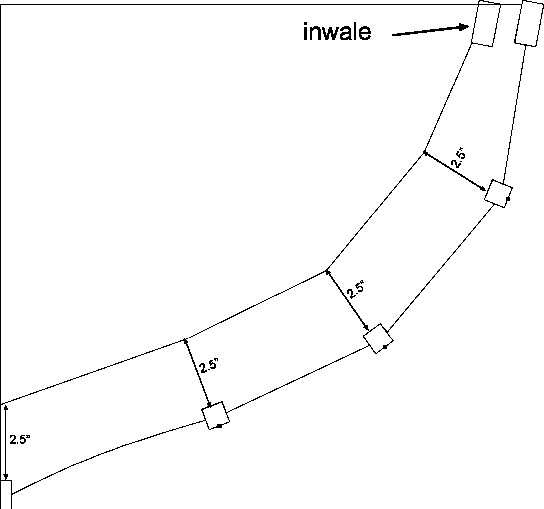
The frames need to be thick enough to handle the rigors of sailing. I made my frames a minimum of 2 1/2" thick everywhere except the gunnels - the inwales are spaced 3/4" in from the gunnels.
I had to take into account the trunk for my daggerboard and flat floorboards, so after much consideration, I made some adjustments to the shape of the frame, removed all the excess bits, mirror imaged it, and came up with this as the whole frame pattern:
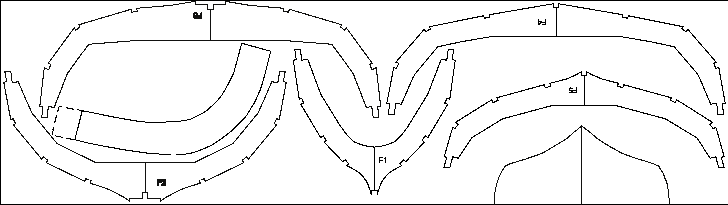
I repeated the process with the other frames, then laid them out for printing. I'm cutting them out of a single sheet of plywood, so I laid them out as tight as I could (each piece is at least 1/2" away from any other.) and came up with this:
It cost me $18 to have this printed out full size, and on the way home, I started thinking about running seats along the sides instead of athwartships, daggerboard trunk support, and mast step/partner support. I reworked everything and re-laid it out. The printer has a max width of 36", so I had to gt creative:
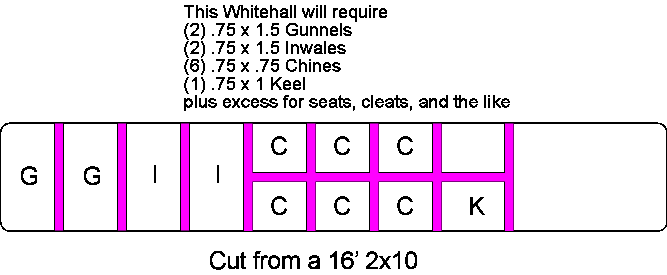
The last thing I considered was how to cut the (2) gunnels, (2) inwales, (6) stringers, and the keel. I'm a cheap b@stard, so I'm not going to buy them pre-cut from the store. I figured I could cut all the peices I needed from a single, perfect, knotless, 14' 2x8 and went to a lumber store. They didn't have any cedar 2x8s and the 2x6s were $73 each, so I rummaged through the fir instead. Fir is MUCH heavier than cedar, but the 16' 2x10 I found only cost me $13. Here's my cut plan for the board
Next Phase: Nope, I got to thinking about those frames and decided to do some more design work.
|