|
Designing a 76sqft Balanced Lug
Jim Michalak's boat designs on Duckwork's Magazine.
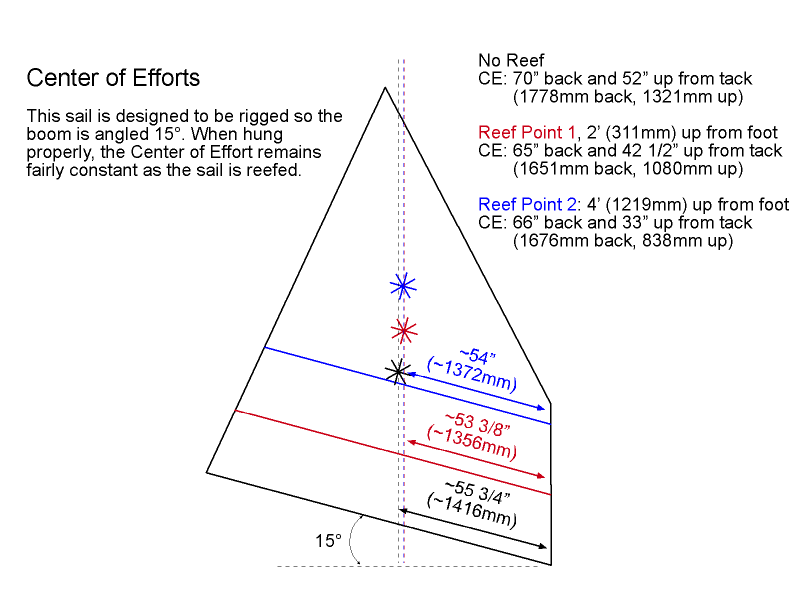
When the sail is rigged properly so the boom is angled at 15°, the CE hardly moves forward.
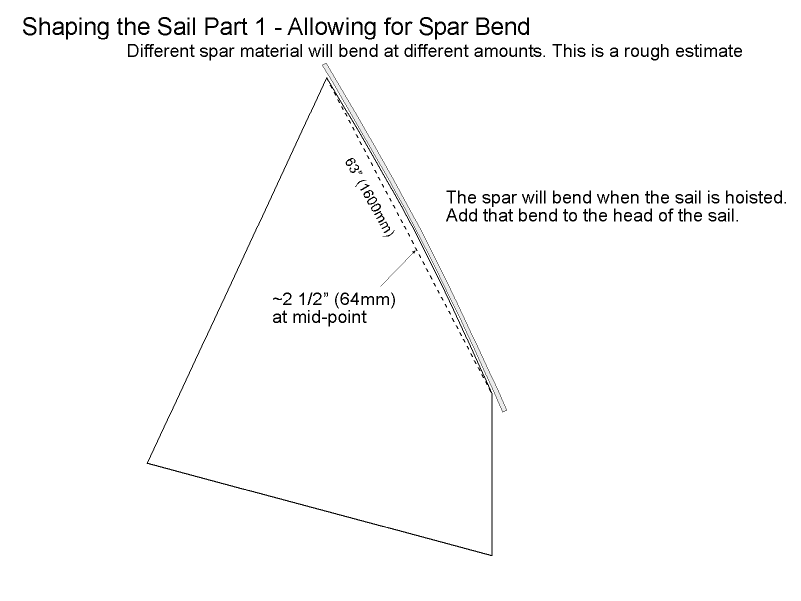
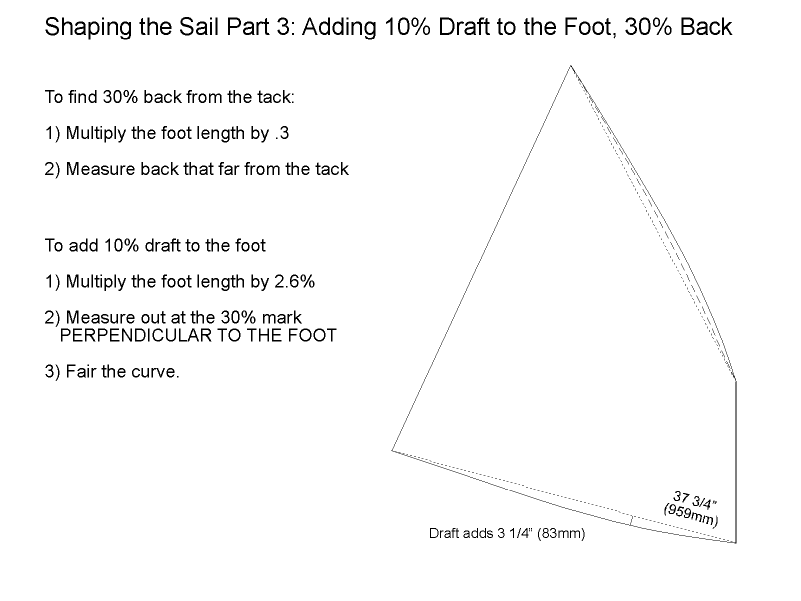
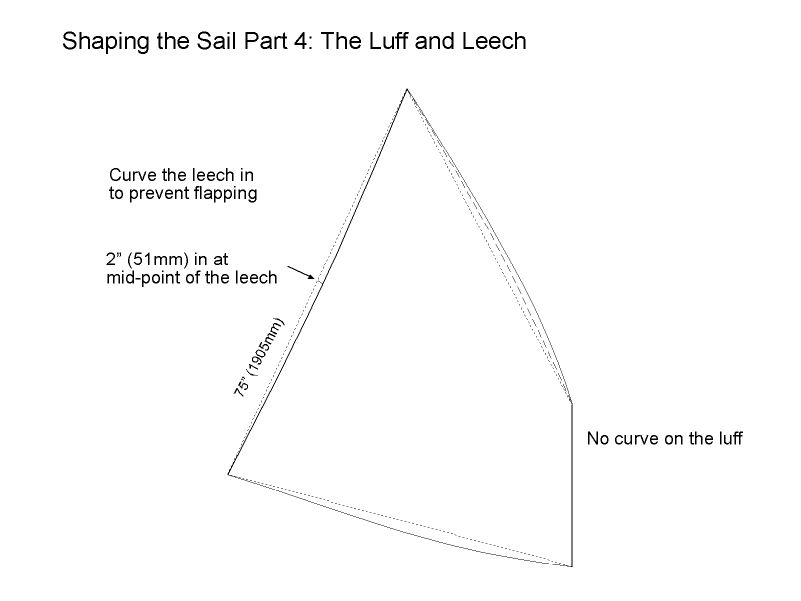
The first consideration is how much sail material to add to take the bending of the spars into account. When hung properly, the yard will be under stress and will bend. I have estimated the spar bend at about 2 1/2" (64mm) when rigged. This is a guess, but it is my guess, so I am sticking to it. 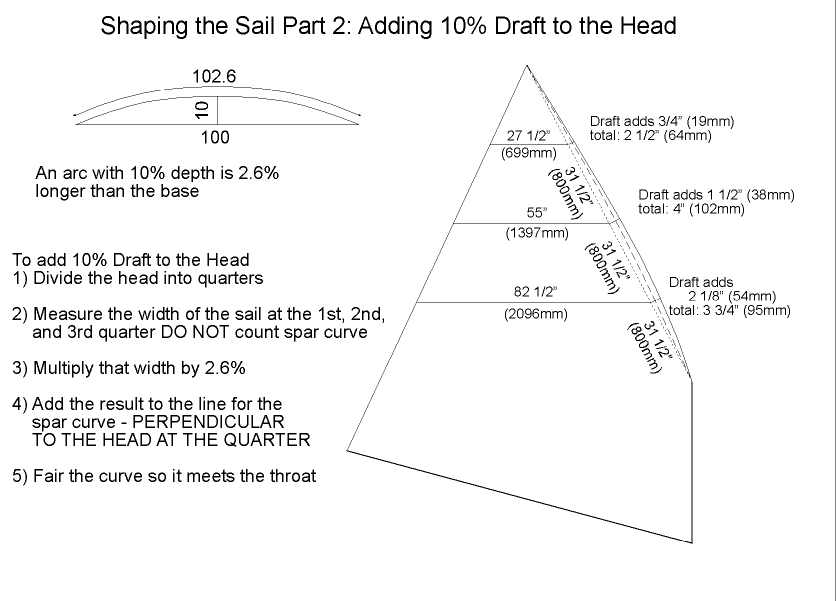 The draft gives the lee side of the sail an airfoil shape, providing lift and pulling the sailboat along. PDRacer.com says we should have a draft of about 10% centered about 30% back. You need to add material to both the head and foot to get draft - we shape the foot in the next slide. It took me some time to digest, then regurgitate these instructions. If they are confusing, look at them again.
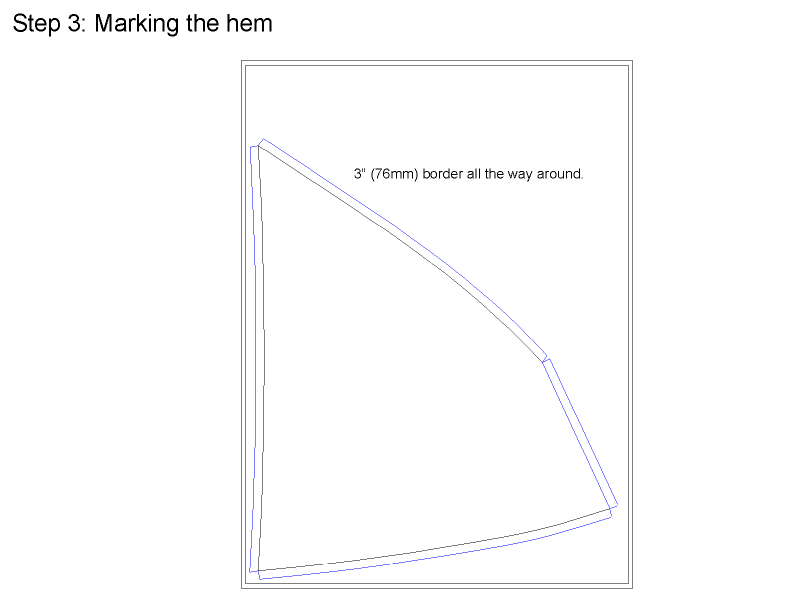
Next, I show how to layout the design onto polytarp so you can cut it out, sew it up, and make a real sail out of it. 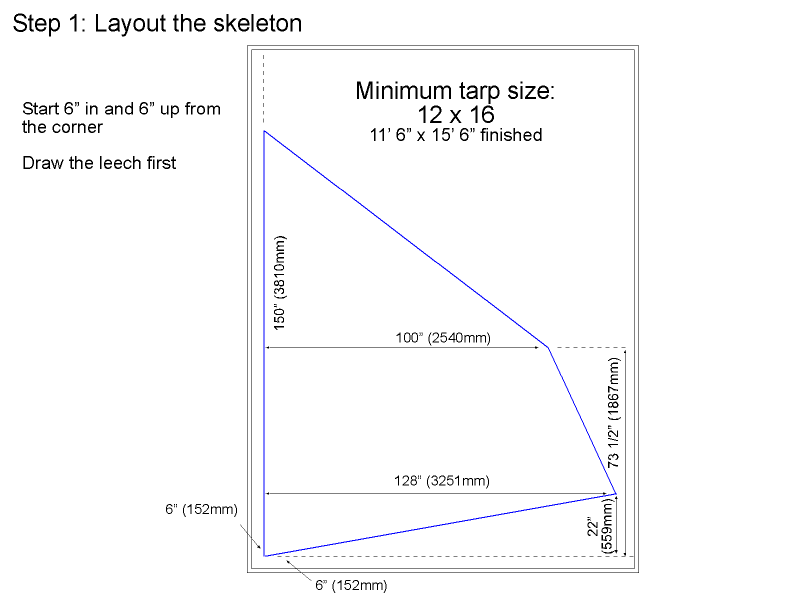 For me, layout is the most difficult part. Finding space large enough is actually the most challenging aspect. Then you have to have battens long enough to reach from clew to peak, and a 13ft bendy stick can be hard to come by. Considerations for the tarp material: 5.5oz (Heavy Duty) is optimal for me. The tarp kits offered by Polysail International are fantastic and you'll save yourself a lot of heartache by going there for your material. The 3.5oz stuff found in 'big box stores' tears out too easily. Start by spreading your tarp out and making your reference point. Everything is measured from there 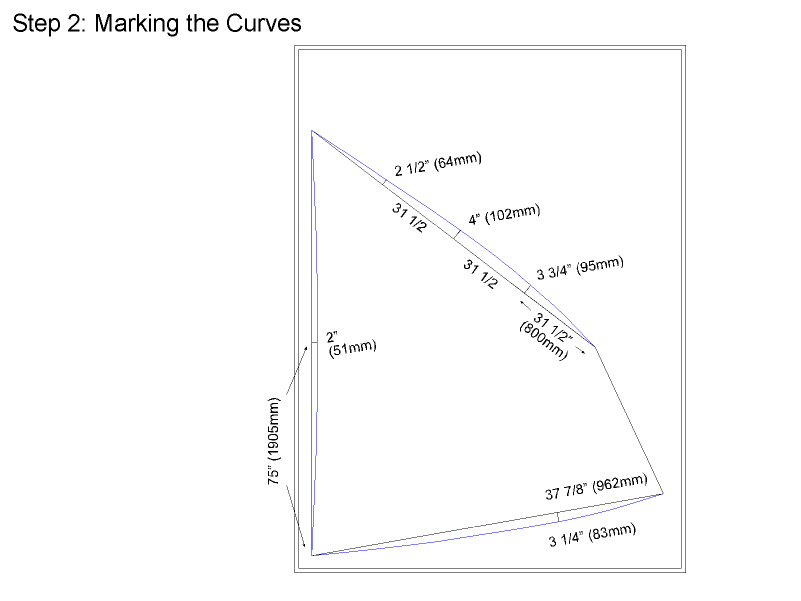 Mark your inflection points and fair with your batten. This goes easier if you have help.
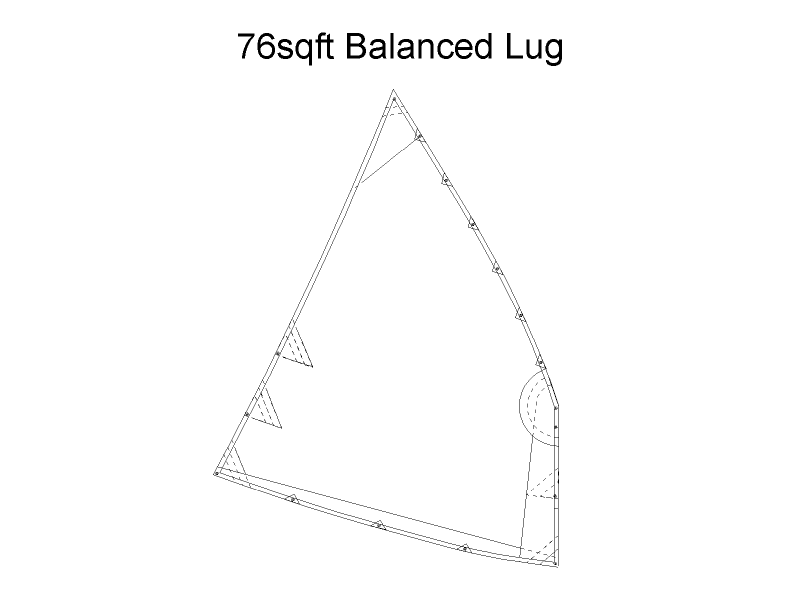
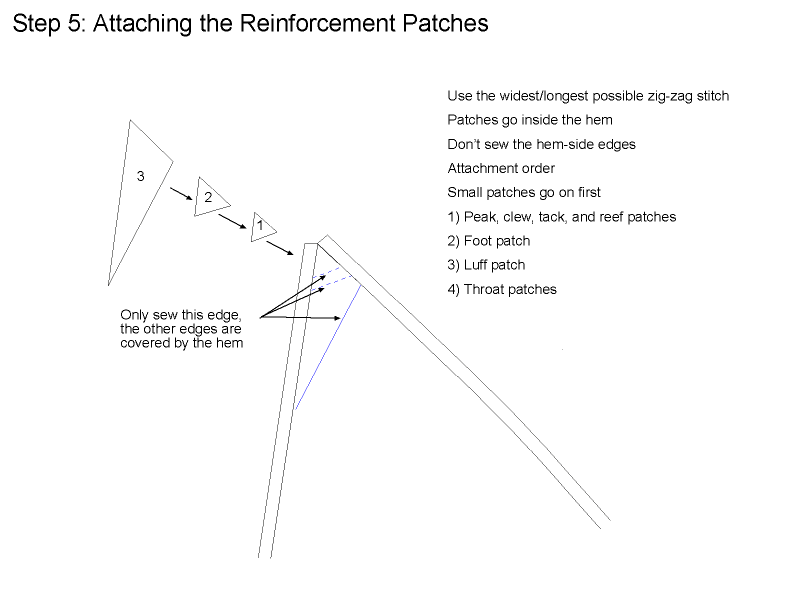
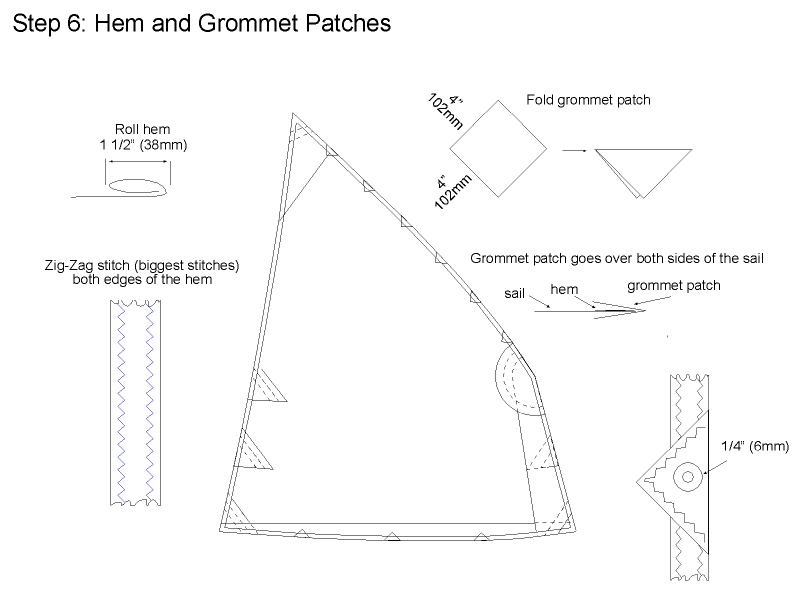
Once you have the sail marked, you can cut it out. 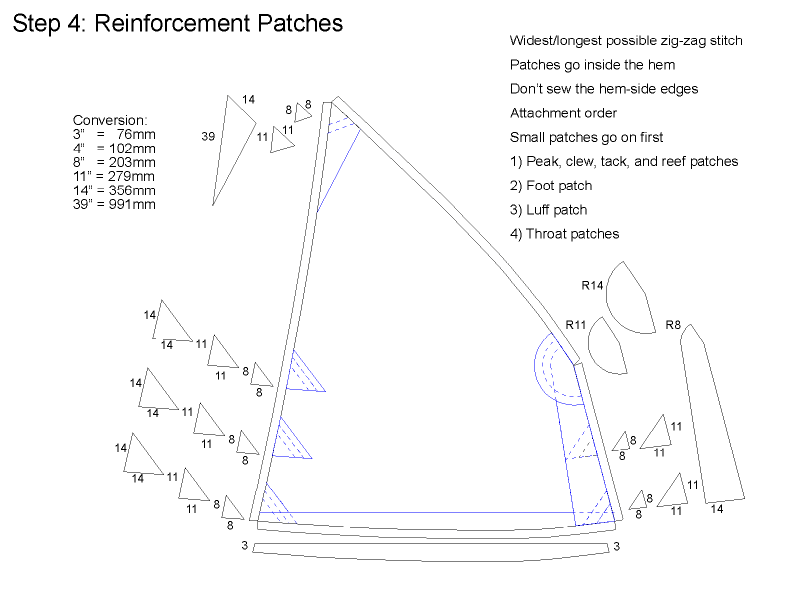 The reinforcement patches are the brilliant part of this sail design
(not my concept - I lifted this straight from Michael Storer, Storer
Boat Designs.) Each corner will have a minimum of 9 layers (sail,
3 patches, and 2 layers of hem from each leg of the corner.) The
reef points will have 7 layers, and the grommet patches will have
5 layers.
|

