|
Fixing the Keel - a Long and Tortured Process
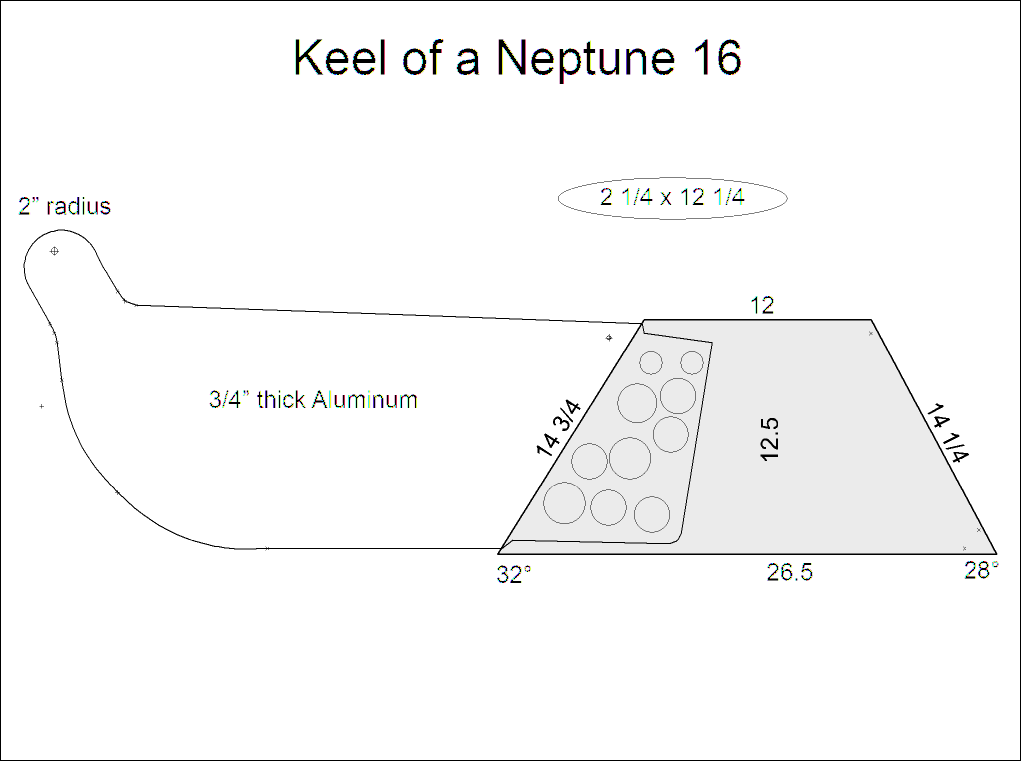
OK, this has been a friggin process. You can go back and look at the other attempt if you want, but this one worked and that's what I'm sticking with. I wanted ~200lbs of lead hanging below my boat.
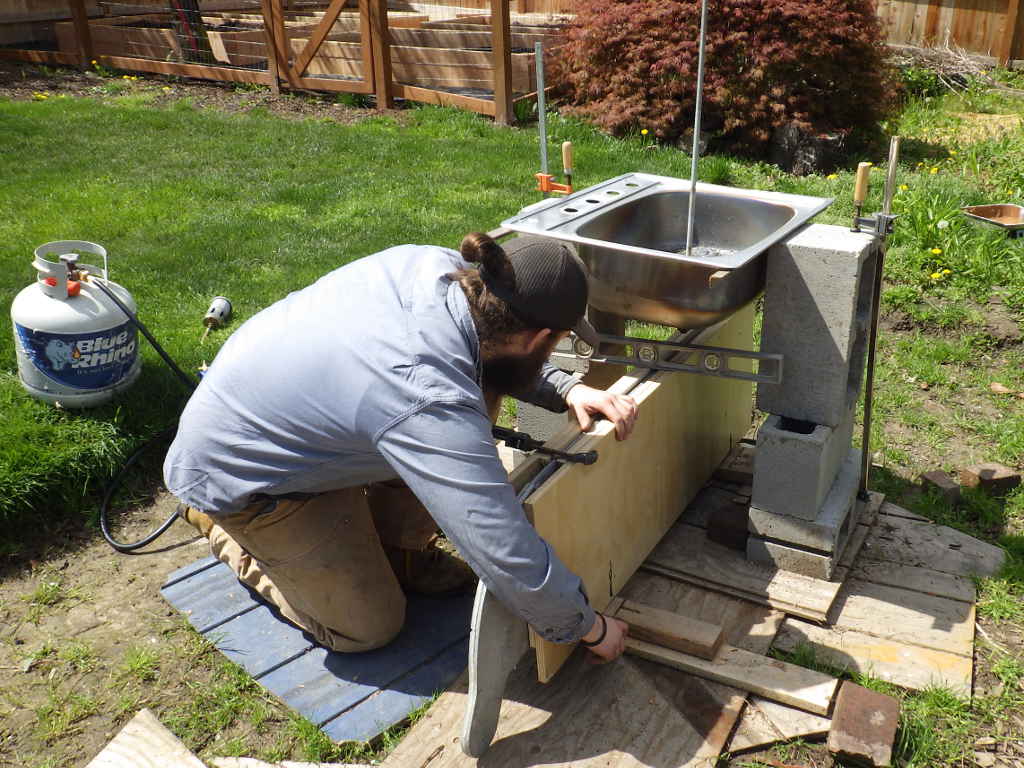
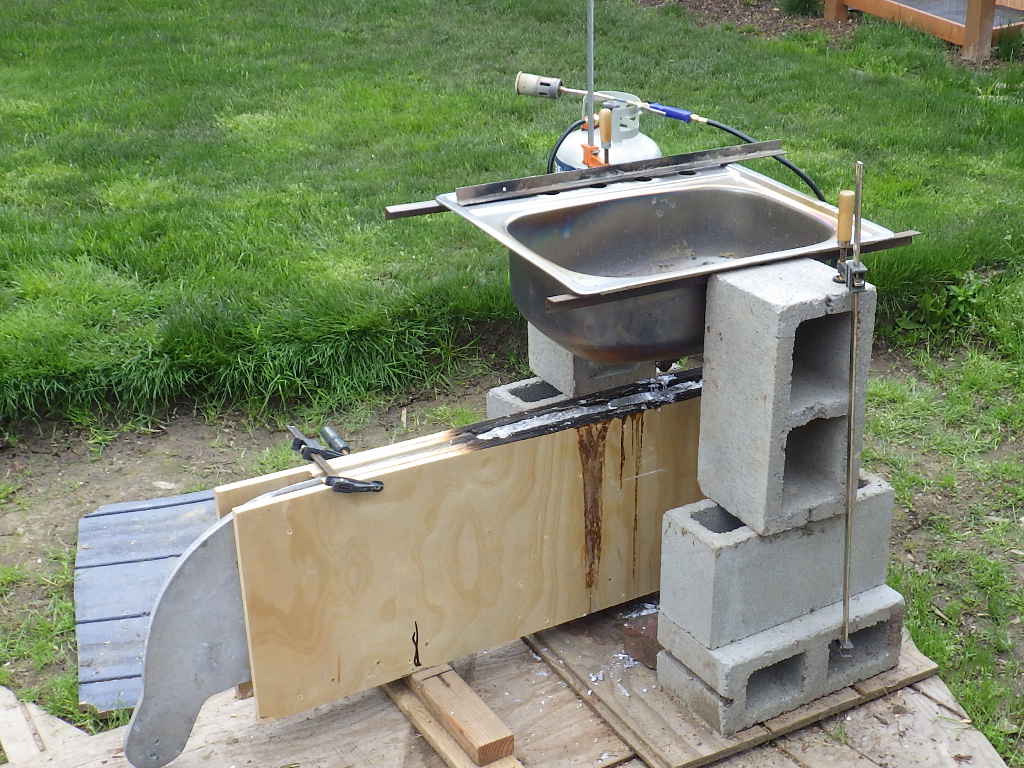
This is Tyler, a guy from work. I roped him into this because . . . why painfully disfigure yourself when you can alter the life of a friend? Tyler is the one who decided a $2 sink from Habitat for Humanity would be a suitable crucible. It was. The mold has been coated with Waterglass, 40% Sodium Silicate, the same stuff they make movie windows out of so stunt men don't get cut to death. The form was 3/4" plywood. We actually did a bit of testing, it worked in a 1"x2"x3", form with over 2lbs of lead. Why not a 27"x12.5"x2.24" form with 230lbs of lead? Scale doesn't matter, does it?
We'd made an attempt once before, but the seal we'd cobbled together to neck the sink drain down to 1/2" for our all-thread started leaking. Lead is kinda hard to get these days, so we aborted that first attempt. For this run, I picked up a couple of $20 weed burners from Harbor Freight and they are just straight up flame throwers.
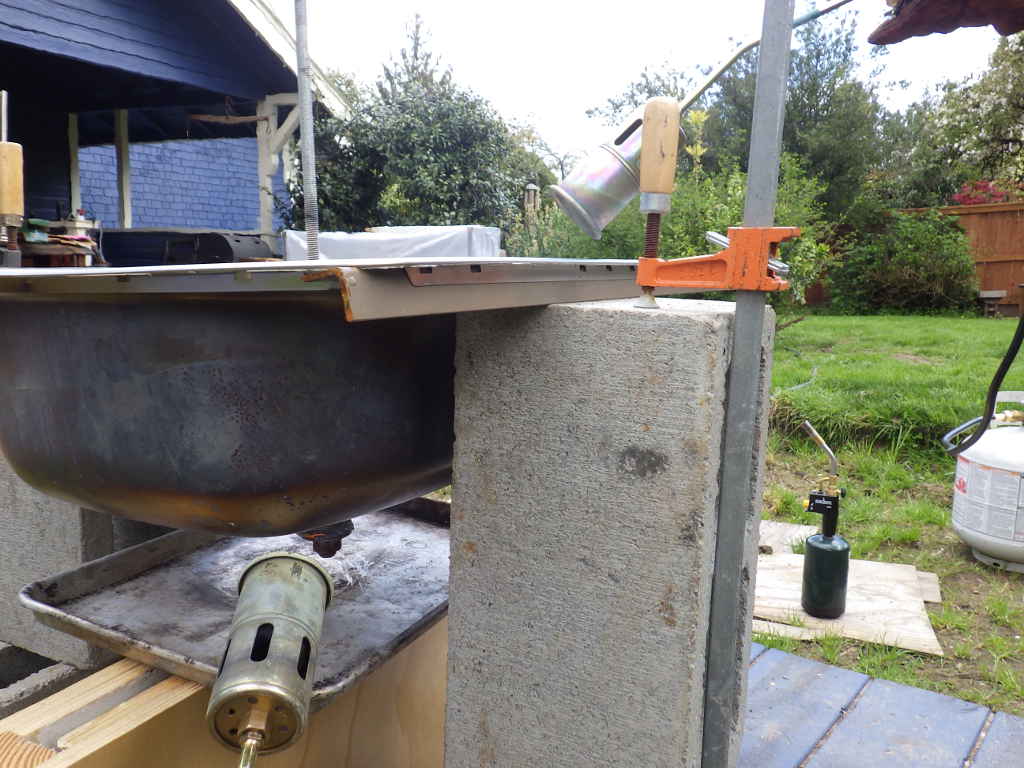
Take your time. We had the cookie sheet to catch any seepage before the actual pour. The idea was to melt mostly from the top, then from the bottom to minimize the leaks.
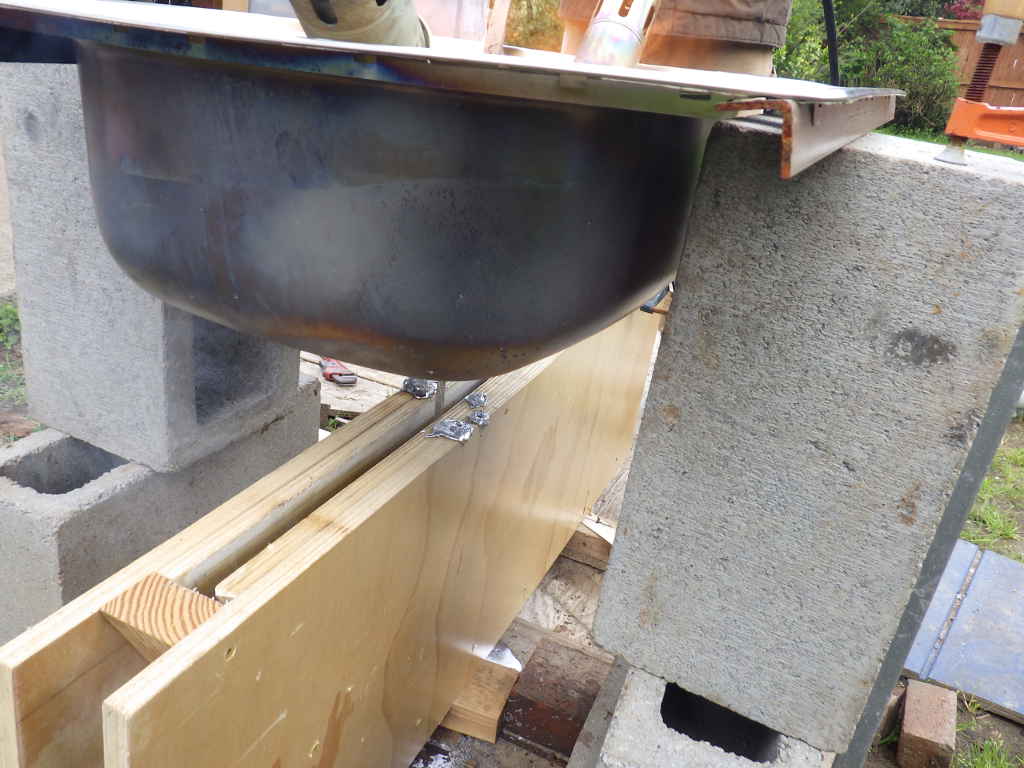
Tyler had a piece of 1/2" all-thread as the block for our crucible. Not the best idea as once we pulled it out it was a little hard to put back in. Lucky for us, we didn't need to do that. Melted the lead and pulled the plug.
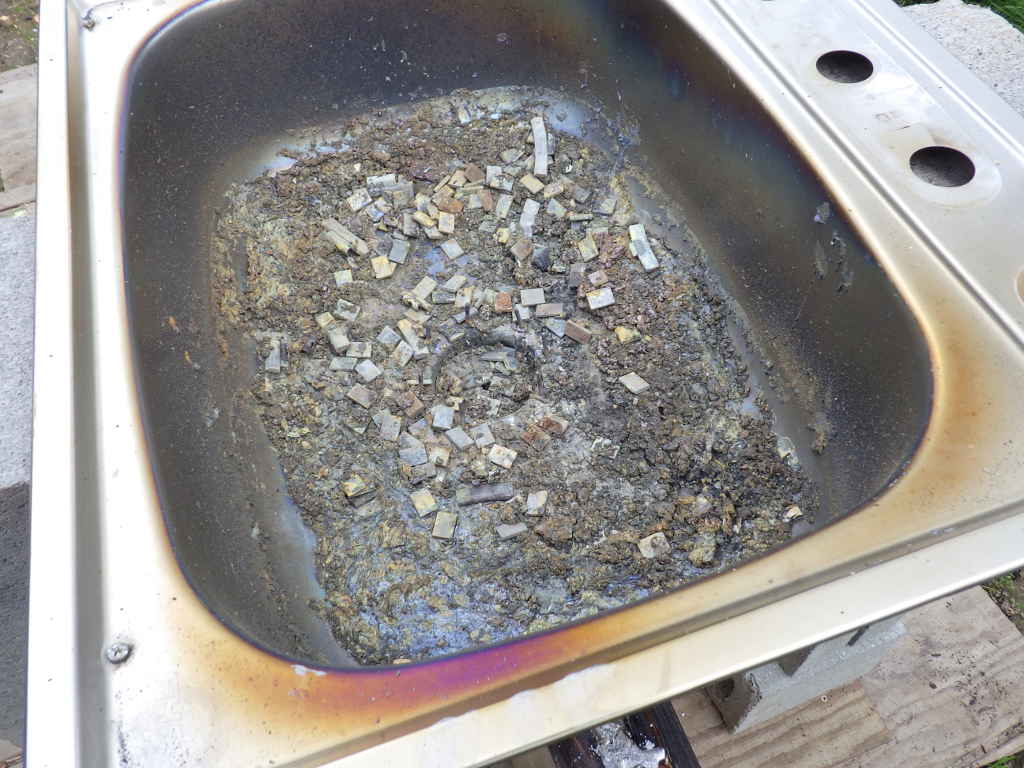
Yup. It filled up. Nobody died.
This was the leftover dross. Not all wheel weights are lead, apparently.
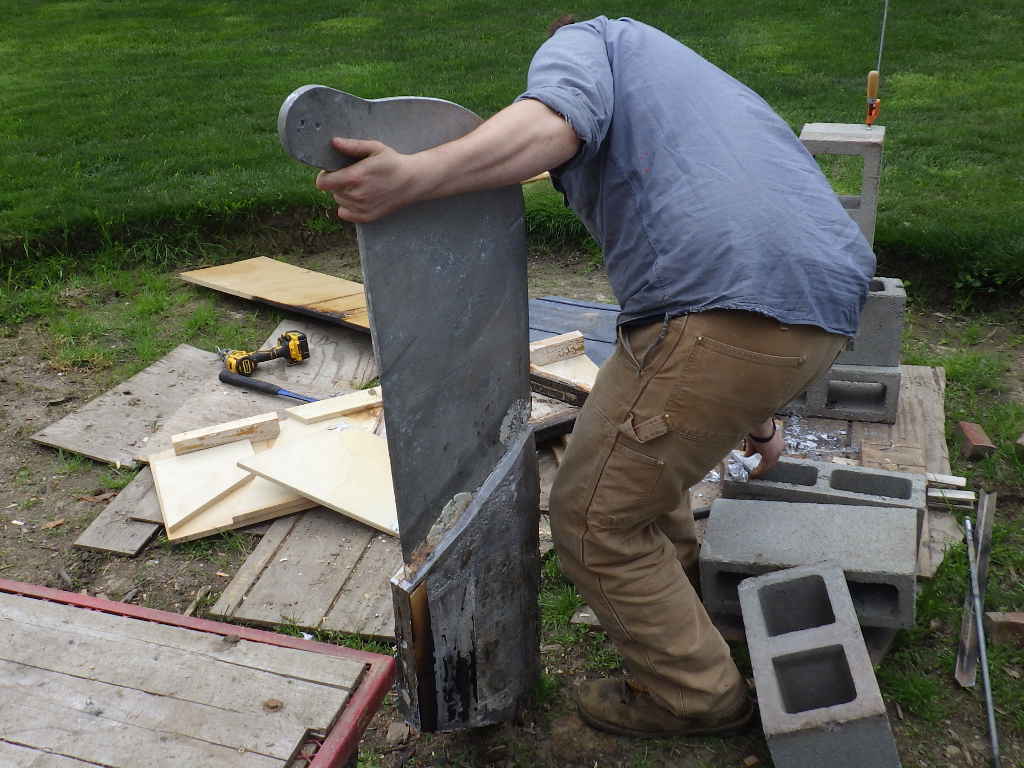
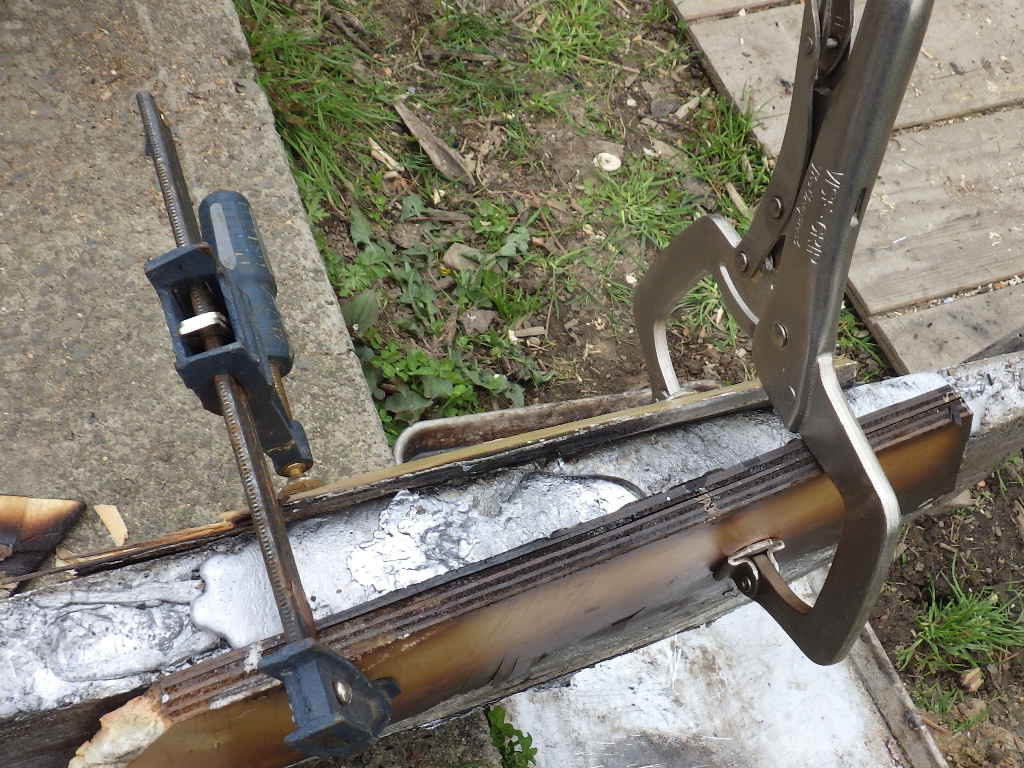
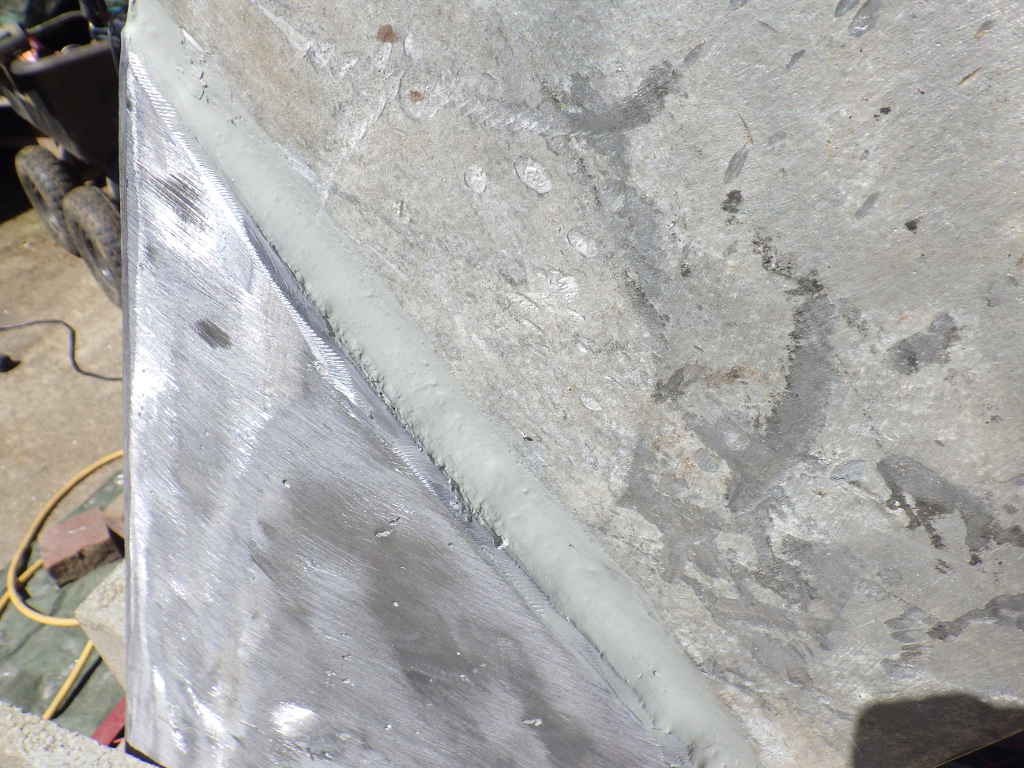
200+ lbs of lead is a pretty good energy well, so we had to wait a day to peel off the mold. Things went well, but not perfectly. That trailing edge is WAY thicker than the anticipated 3/4". See those gray-ish splotches at the join between the aluminum and the lead? That's spackle. The neck is shaped and my mold was not, so I used spackle to fill in any voids, expecting the lead to cool enough to seal leaks before the spackle caught fire. I was right.
Lead contracts as it cools. Smart people understand the heat to contraction ratio. Tyler and I, on the other hand, just filled the void with more lead. Plan on at least 10% more lead than you need.
The void was pretty big and had openings on the side. Screw it - clamp some ply over the holes and pour away. We'll fix it in post production.
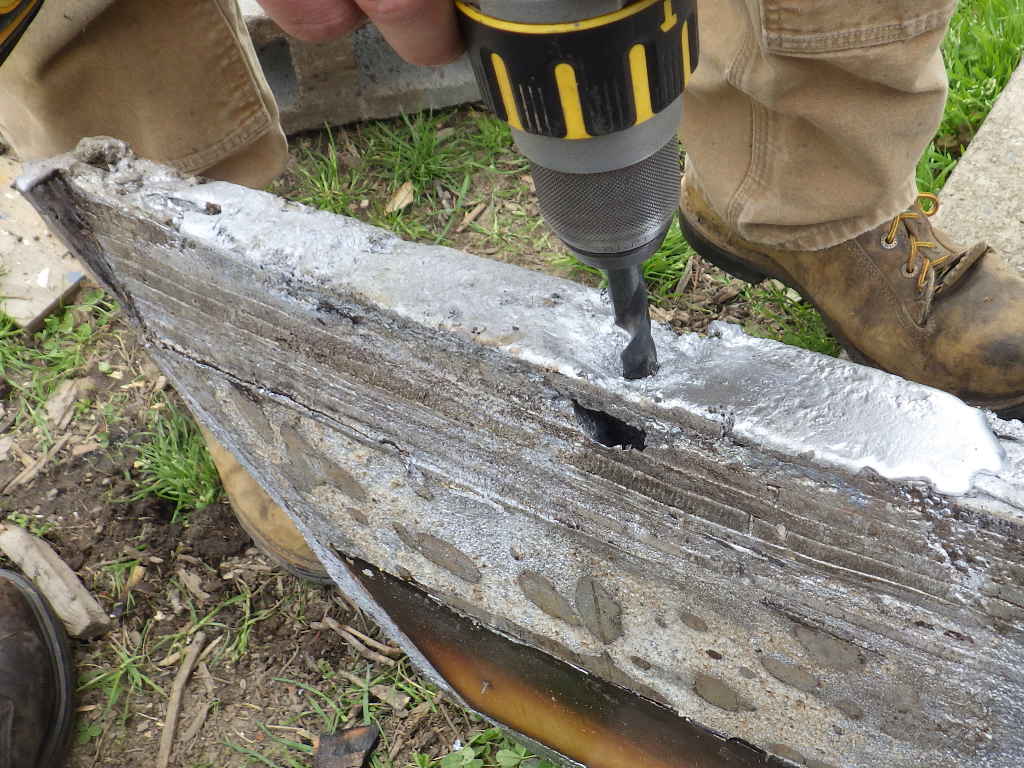
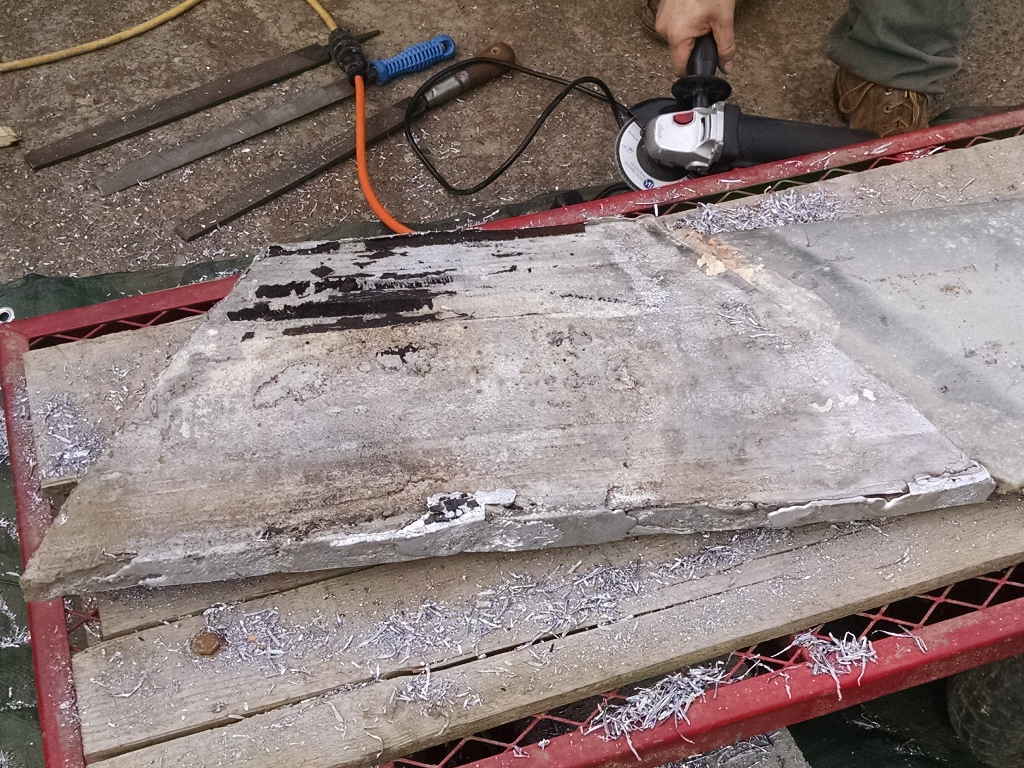
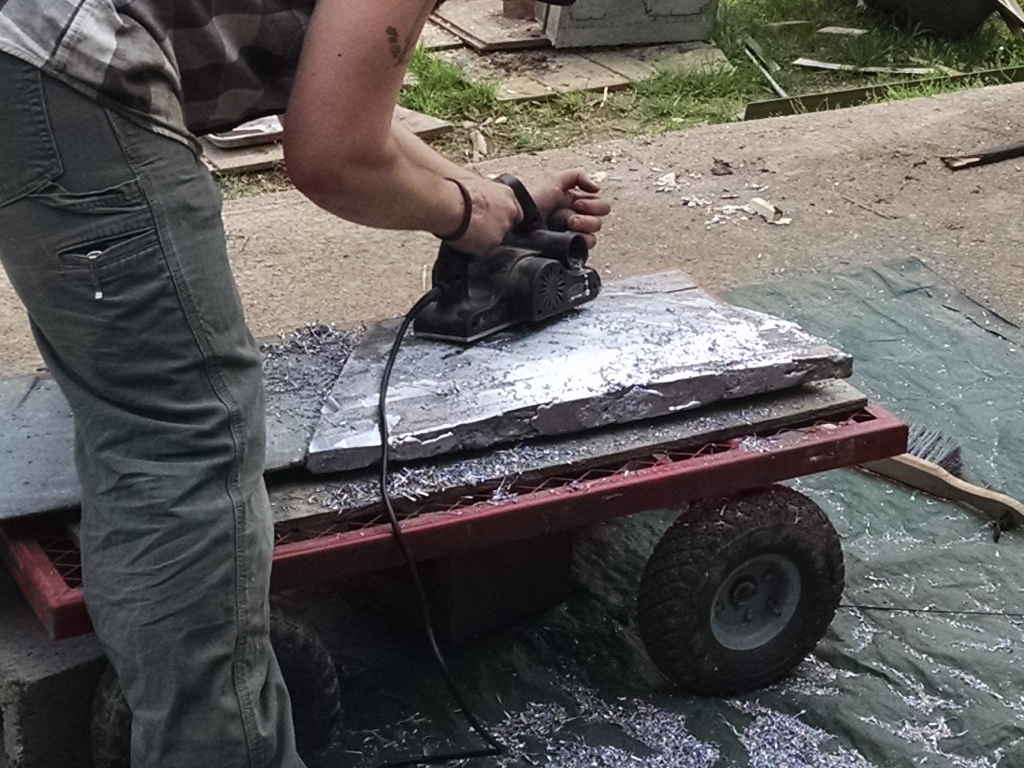
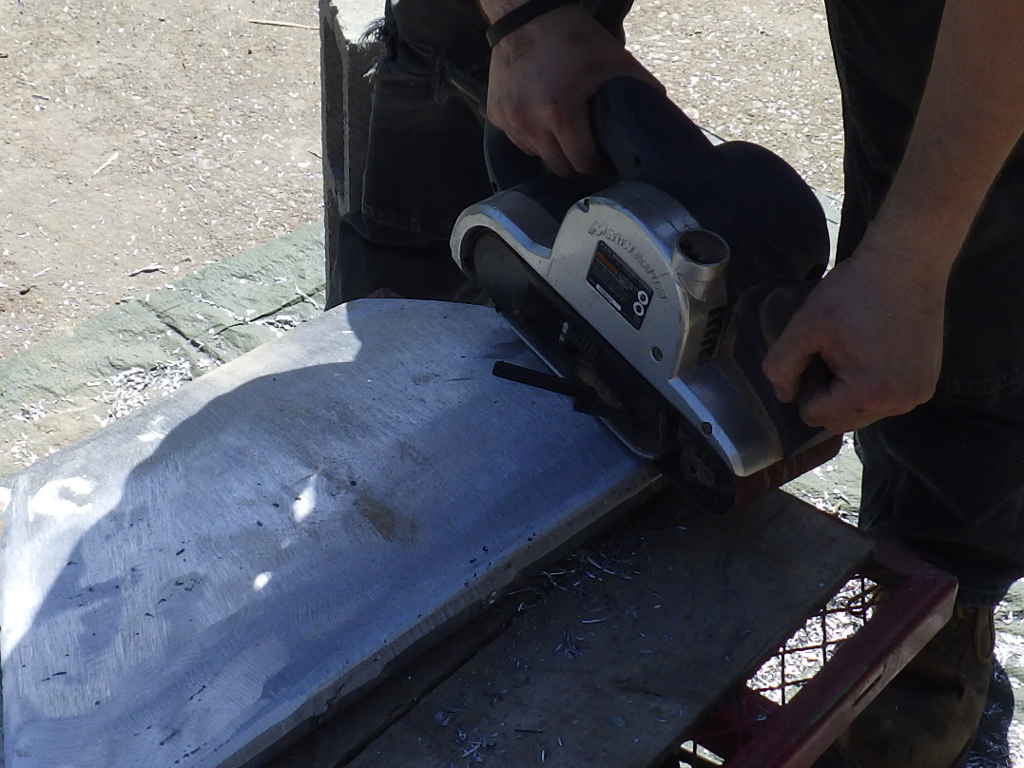
This is when Harbor Freight is your friend. Buy a disposable planer and make that keel your own. Planer to Angle Grinder to 4x24 Belt Sander to rasps.
Poor Tyler. He'll be be cleaning lead bits out of his patio for decades.
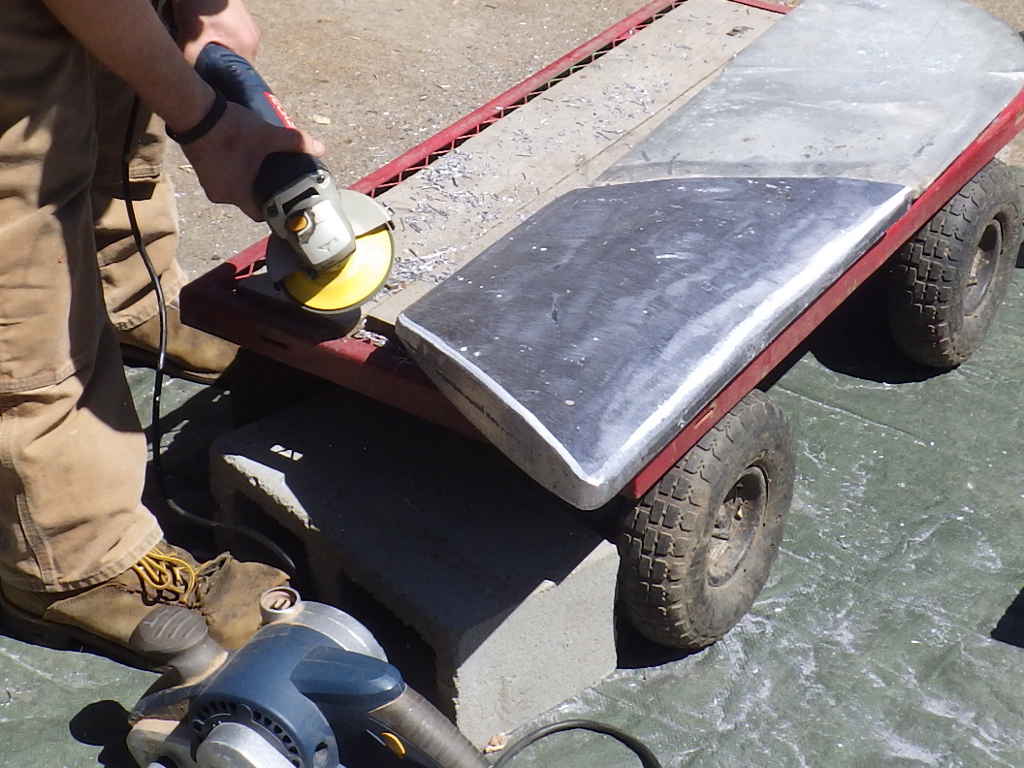
If you don't have a 4.5" angle grinder with a sanding wheel and 36 grit paper, you ain't got nuthin'.
Lead clogs belts. Buy lots. In my world, 60 grit is finish sanding. This was 36.
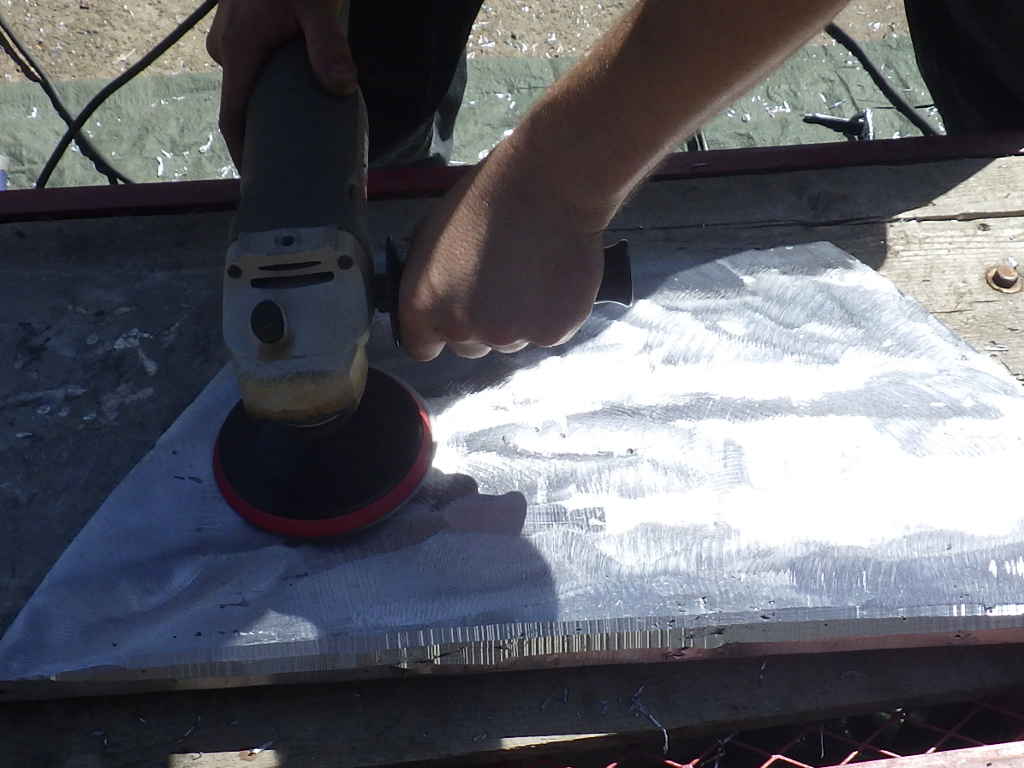
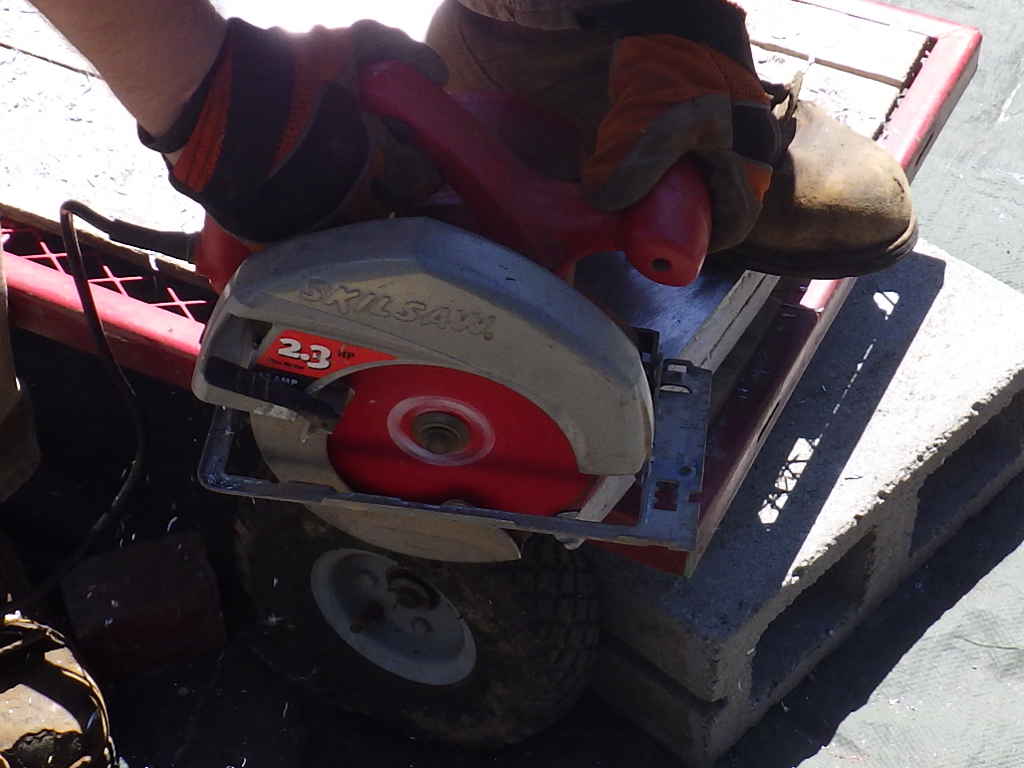
We could have spent 20 minutes to sand the toe rount, but I own a cicular saw.
Final shaping
Lead is an element. Aluminimum is an element, Normally, they are sorta stable, but in the presence of an electrolite (like water, especially salt water) one or the other (can't reember which) shares an electron or two and the aluminium corrodes. where the metals touch. Can some caulking prevent that" I don't know, lets see. So that's all I have on ths one. I should have tanek more picutres and more notes, but I wasn't sure it was going to work at any stage.
|